Hypeladies Makeup Tutorial can transform your look and boost your confidence. Whether you’re a beginner or want to refine your skills, a makeup tutorial can guide you.
Learning makeup techniques can seem overwhelming at first. But with the right guidance, it becomes fun and easy. This blog post will explore step-by-step makeup tutorials designed for every skill level. From basic foundation application to advanced eye shadow blending, you’ll find tips and tricks to enhance your beauty routine.
Dive in to discover simple, clear instructions that make makeup application a breeze. Get ready to create stunning looks that suit any occasion.

Credit: www.vexels.com
Essential Tools
Whether you are a makeup novice or a seasoned pro, having the right tools can make all the difference in your makeup tutorial journey. Essential tools not only simplify the makeup application process but also help you achieve a flawless look every time. Let’s dive into the key tools you need to enhance your beauty techniques and master your makeup application.
Brushes And Sponges
Makeup brushes and sponges are fundamental cosmetic tools for achieving a professional finish. Each tool serves a unique purpose, making it easier to apply different products and create various looks. Makeup Brushes:
- Foundation Brush: Ideal for smooth foundation blending, ensuring an even base.
- Concealer Brush: Helps in precise application of concealer to cover blemishes and dark circles.
- Eyeshadow Brush: Perfect for eyeshadow application, allowing you to blend colors effortlessly.
- Blending Brush: Used for blending eyeshadow shades seamlessly.
- Contour Brush: Essential for contouring tips, defining facial features with precision.
- Blush Brush: Designed for applying blush to the cheeks, providing a natural flush.
Makeup Sponges:
- Beauty Blender: A versatile tool for foundation blending, offering a smooth, airbrushed finish.
- Mini Sponge: Great for detailed work, especially around the eyes and nose.
Using the right brushes and sponges can greatly improve your makeup techniques. They help distribute products evenly and blend them seamlessly into the skin, enhancing your overall look.
Makeup Products
Having the right beauty products is just as important as having the right tools. Here are some essential makeup products that form the foundation of any makeup routine: Foundation: Provides a base for your makeup, evening out your skin tone.
- Choose a foundation that matches your skin type and tone.
- Use a foundation brush or sponge for an even application.
Concealer: Helps cover blemishes, dark circles, and imperfections.
- Opt for a concealer one shade lighter than your foundation.
- Apply with a concealer brush for precise coverage.
Eyeshadow: Adds color and depth to your eyes.
- Select shades that complement your eye color and skin tone.
- Blend using an eyeshadow brush for a seamless look.
Blush: Gives your cheeks a healthy, natural glow.
- Choose a shade that matches your skin’s undertone.
- Apply with a blush brush for a soft finish.
Contour and Highlight: Define your features and add dimension to your face.
- Use a contour brush for precise application.
- Highlight the high points of your face for a radiant look.
Proper skincare prep is also crucial before applying any beauty products. Cleanse, tone, and moisturize your skin to ensure a smooth canvas for makeup application.
Skin Preparation

Every successful makeup tutorial starts with proper skin preparation. A smooth and clean canvas enhances makeup application, ensuring a flawless finish. Let’s dive into the essential steps of skin preparation.
Cleansing
Before applying any makeup, begin with cleansing. Clean skin is the foundation of a beautiful makeup look. It removes dirt, oil, and impurities that can clog pores and cause breakouts. Follow these steps for effective cleansing:
- Choose a gentle cleanser suitable for your skin type.
- Wet your face with lukewarm water to open your pores.
- Apply the cleanser using your fingertips in circular motions.
- Rinse thoroughly with cool water to close your pores.
- Pat your face dry with a clean towel.
Here’s a quick comparison of different cleansers:
| Cleanser Type | Suitable For | Benefits |
|---|---|---|
| Foaming Cleanser | Oily Skin | Removes excess oil |
| Cream Cleanser | Dry Skin | Hydrates skin |
| Gel Cleanser | Combination Skin | Balances skin |
Cleansing is crucial for your skincare prep. It sets the stage for your beauty routine, including foundation techniques and eyeshadow blending.
Moisturizing
After cleansing, moisturizing is the next step. It keeps your skin hydrated and smooth, creating the perfect base for makeup application. Consider these tips for effective moisturizing:
- Pick a moisturizer that matches your skin type.
- Apply the moisturizer to damp skin for better absorption.
- Use a pea-sized amount to cover your face and neck.
- Massage gently in upward strokes to promote circulation.
- Let it absorb fully before applying makeup.
Here’s a quick guide to choosing the right moisturizer:
| Moisturizer Type | Suitable For | Benefits |
|---|---|---|
| Gel Moisturizer | Oily Skin | Lightweight and non-greasy |
| Cream Moisturizer | Dry Skin | Rich and hydrating |
| Lotion Moisturizer | Normal Skin | Balanced hydration |
Moisturizing is essential for achieving a flawless finish. It helps your foundation techniques, contouring tips, and lipstick application look their best.
Base Makeup
Makeup is an art, and mastering it can elevate your look to the next level. For beginners, base makeup is the foundation for any great look. It sets the stage for all other makeup steps, such as eyeshadow application and contouring techniques. A flawless base ensures that your makeup stays put and looks fresh all day. This beauty tutorial will guide you through the basics of applying foundation and concealer, providing essential makeup tips for a perfect finish.
Foundation Application
Foundation is key to a smooth and even complexion. Start by choosing the right shade that matches your skin tone. To find your perfect match, test the foundation on your jawline. Here are the steps for flawless foundation application:
- Prep Your Skin: Cleanse, tone, and moisturize your face. Use a primer to create a smooth base and help the foundation last longer.
- Choose the Right Tool: Depending on your preference, use a makeup brush, sponge, or your fingers. Each tool offers a different finish.
- Apply Foundation: Start with a small amount of foundation on your brush or sponge. Dot it on your forehead, cheeks, nose, and chin.
- Blend: Use circular motions or dabbing motions to blend the foundation. Make sure to blend into your hairline and jawline for a seamless look.
- Build Coverage: If you need more coverage, apply another thin layer. Avoid caking by applying too much at once.
- Set Your Foundation: Use a setting spray or powder to lock your foundation in place.
Remember, less is more. A natural look is achieved by building up coverage gradually. This technique ensures your skin looks flawless without appearing heavy.
Concealer Techniques
Concealer is essential for hiding blemishes, dark circles, and imperfections. It brightens your face and enhances your overall look. Follow these concealer techniques for best results:
- Choose the Right Shade: For dark circles, use a concealer one shade lighter than your foundation. For blemishes, match your foundation shade.
- Apply Under Eyes: Draw an inverted triangle under your eyes. This technique brightens and lifts your face.
- Blend: Use a damp makeup sponge or your ring finger to blend. Pat gently to avoid tugging at the delicate under-eye area.
- Spot Concealing: Dab concealer on blemishes or red spots. Use a small, precise brush for targeted application.
- Highlight and Contour: Use a lighter concealer to highlight the high points of your face. Use a darker shade to contour and define features.
- Set Concealer: Use a translucent powder to set the concealer. This prevents creasing and keeps it in place all day.
Concealer can also be used to clean up eyeliner application or define your eyeshadow. These makeup tips ensure your base makeup is flawless and ready for any eye makeup look.

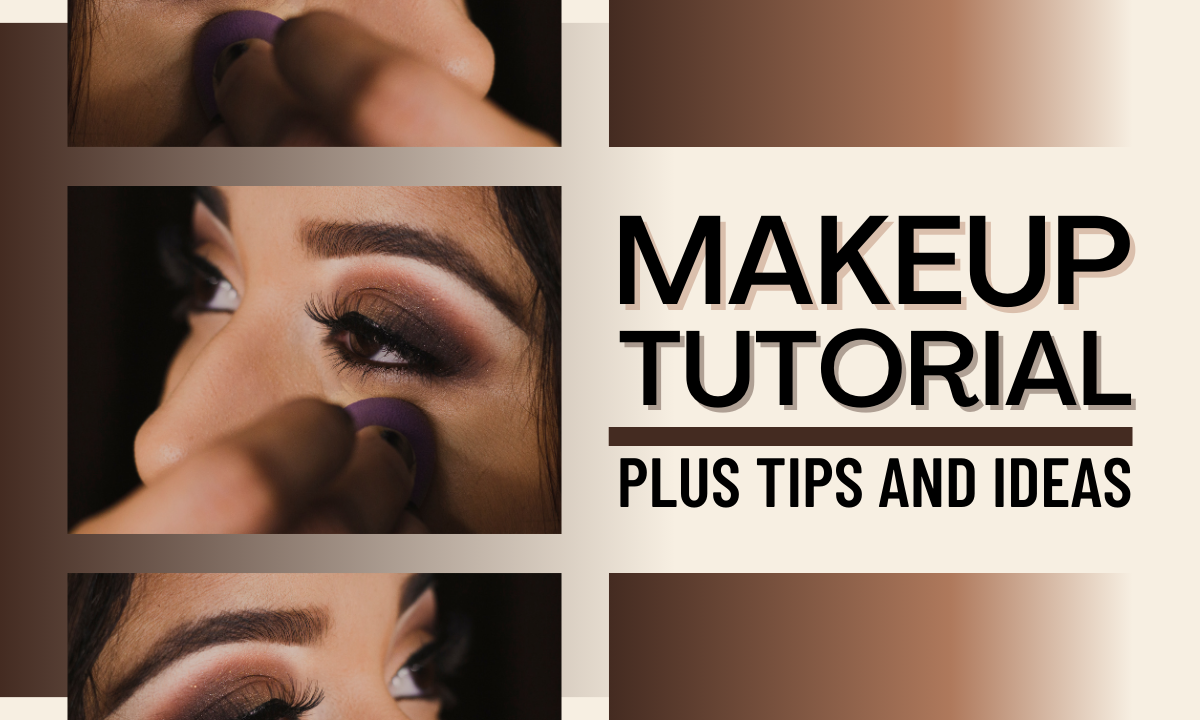
Eye Makeup
Eye makeup can transform your look and highlight your natural beauty. Whether you are a makeup beginner or an experienced enthusiast, mastering eye makeup is essential. It involves more than just applying eyeshadow and eyeliner. It’s about understanding the techniques that work best for you. In this section, we’ll dive into essential eye makeup tips, including eyeshadow application and different eyeliner styles.
Eyeshadow Tips
Eyeshadow can add depth and dimension to your eyes. Here are some essential eyeshadow tips to keep in mind:
- Start with a primer: Using an eyeshadow primer ensures that your makeup stays in place all day. It also makes the colors pop.
- Select the right brushes: Having the right makeup tools is crucial. Use fluffy brushes for blending and flat brushes for packing on color.
Blending is key to achieving a seamless look. Here are some eyeshadow blending tips:
- Use transition shades: Start with a light transition shade in the crease. This helps in blending other colors smoothly.
- Layer gradually: Build up the intensity of your eyeshadow in layers. It’s easier to add more color than to remove excess.
- Blend with a clean brush: Use a clean, fluffy brush to blend out harsh lines. This ensures a smooth gradient effect.
Understanding how to create different looks can be helpful. Here’s a simple guide:
| Look | Steps |
|---|---|
| Natural | Use neutral shades. Apply a light base color, a medium shade in the crease, and a slightly darker shade on the outer corner. |
| Smoky | Start with a dark base. Use a dark shade on the lid, blend into the crease with a medium shade, and highlight the brow bone with a light color. |
Eyeliner Styles
Eyeliner can define your eyes and add drama. Here are some popular eyeliner styles to try: Classic Winged: This style is timeless. It involves drawing a thin line along the upper lash line and extending it slightly beyond the outer corner. Use a liquid or gel liner for precision. Smudged: For a softer look, smudge a pencil liner along the upper and lower lash lines. This gives a more casual, yet chic appearance. Here are some eyeliner application tips:
- Steady your hand: Rest your elbow on a flat surface to keep your hand steady.
- Start thin: Begin with a thin line and build up the thickness as needed.
- Use short strokes: Draw short, connected strokes rather than one continuous line.
Matching the eyeliner style to the occasion can enhance your overall look. Consider these options:
| Occasion | Style |
|---|---|
| Everyday | Thin, tight-lined along the lashes for a natural look. |
| Evening | Bold winged liner or a dramatic cat-eye for a glamorous effect. |
Experiment with different eyeliner styles to find what suits you best. Remember, makeup artistry is all about practice and having fun. Try new techniques and enjoy the process of perfecting your eye makeup.
Eyebrow Shaping
Eyebrow shaping is crucial for a polished makeup look. Well-defined brows frame the face and enhance features. This tutorial will guide you through the steps of shaping and maintaining perfect eyebrows. Whether you are a makeup novice or pro, these tips will help you achieve flawless brows.
Filling Techniques
Proper filling techniques can transform sparse brows into fuller, well-defined ones. Start by selecting a brow pencil or powder that matches your natural hair color. Follow these steps for perfect brow filling:
- Brush brows upward with a spoolie brush.
- Outline the bottom and top edges of the brow with light strokes.
- Fill in the brow with small, hair-like strokes for a natural look.
- Blend the product with a spoolie brush to soften harsh lines.
For a bolder look, use a brow pomade and an angled brush. This method provides a more defined and structured appearance. Here’s a quick comparison of brow products:
| Product | Finish | Best For |
|---|---|---|
| Pencil | Natural | Everyday use |
| Powder | Soft | Light filling |
| Pomade | Bold | Defined look |
Experiment with different products to find what works best for you. The right technique and product can make a big difference in your makeup routine. Incorporate these steps into your makeup application for stunning brows.
Brow Gel Usage
Brow gel is essential for keeping your brows in place all day. It adds texture and volume, giving a polished finish. Here’s how to use brow gel effectively:
- Choose a clear or tinted brow gel. Clear gel sets the brows without altering color, while tinted gel adds definition.
- Brush the gel through your brows in an upward motion. This lifts the hairs and adds volume.
- Use the tip of the wand to define the tail of the brows.
- Allow the gel to dry completely to set the shape.
Brow gel can be used alone or as a final step after filling. It’s perfect for a quick touch-up or a finished look. Beauty tips: For a natural effect, use a light hand when applying tinted gel. Brow gel is versatile and easy to use. It’s a must-have in your makeup tools collection. Adding it to your routine can enhance your eyebrow shaping efforts, ensuring your brows stay perfect all day. Combine it with other highlighting techniques for a complete look.

Cheeks And Contour
Welcome to our makeup tutorial! Today, we’ll focus on enhancing your cheeks and defining your contour. Learning the art of applying blush and contouring can elevate your makeup game, adding dimension and a healthy glow to your face. Let’s dive into the essential techniques and tips to make your cheeks look stunning.
Blush Application
Blush adds color to your cheeks, giving you a natural, flushed look. The right blush application can make you look more youthful and vibrant. Here’s how to apply blush for the perfect rosy cheeks:
- Choose the Right Shade: Pick a blush that complements your skin tone. For fair skin, light pinks and peaches work best. Medium skin tones look great with rose or mauve shades, while deep skin tones can rock bright pink or berry hues.
- Pick the Right Formula: Blush comes in various forms like powder, cream, and gel. Powder blush is great for oily skin, while cream and gel blushes work well for dry skin.
- Use the Right Brush: A fluffy, angled brush is ideal for powder blush, while a synthetic brush or even your fingers work well for cream blush.
Steps to Apply Blush:
- Smile: This helps you find the apples of your cheeks.
- Dip and Tap: Dip your brush into the blush, then tap off the excess to avoid over-application.
- Apply: Start at the apples of your cheeks and blend upwards towards your temples in a circular motion. This technique ensures a natural finish.
- Blend: Use a clean brush to blend any harsh lines for a seamless look.
Blush can be subtle or bold, depending on your preference. Experiment with different techniques to find what works best for you.
Contouring Basics
Contouring adds depth and definition to your face, enhancing your natural bone structure. Here’s a simple guide to get you started:
| Face Shape | Contour Areas |
|---|---|
| Oval | Forehead, under cheekbones, jawline |
| Round | Temples, under cheekbones, jawline |
| Square | Sides of forehead, under cheekbones, jawline |
Steps to Contour:
- Select a Contour Product: Choose a contour product that is two shades darker than your skin tone. Cream or powder formulas work well.
- Apply to Key Areas: Use a brush or sponge to apply the contour product to areas you want to define:
- Under cheekbones
- Sides of the nose
- Jawline
- Forehead
- Blend Well: Blending is crucial for a natural look. Use a damp sponge or a clean brush to blend the contour lines into your skin.
Contouring can seem tricky, but practice makes perfect. Start with a light hand and build up the intensity as needed. With time, you’ll master the art of contouring and achieve a beautifully sculpted face.
Lip Makeup
Your lips can make a statement with the right products and techniques. From choosing the right lipstick to mastering lip liner, this guide will help you achieve flawless lip makeup.
Lipstick Types
Choosing the right lipstick type is essential for achieving your desired look. Different lipsticks offer various finishes and benefits. Here are some common types:
- Matte Lipstick: Provides a flat, non-shiny finish. Ideal for a bold, long-lasting look.
- Satin Lipstick: Offers a smooth, semi-matte finish. Perfect for a natural, everyday look.
- Gloss Lipstick: Gives a shiny, glossy finish. Great for adding volume and hydration.
- Liquid Lipstick: Comes in a liquid form and dries to a matte or glossy finish. Known for its long-lasting properties.
- Sheer Lipstick: Provides a light wash of color. Ideal for a subtle, no-makeup look.
Understanding the different types of lipsticks helps in making an informed choice. Consider your foundation type and overall makeup style when selecting a lipstick.
| Lipstick Type | Finish | Best For |
|---|---|---|
| Matte | Flat, Non-Shiny | Bold, Long-Lasting Look |
| Satin | Smooth, Semi-Matte | Natural, Everyday Look |
| Gloss | Shiny, Glossy | Adding Volume, Hydration |
| Liquid | Matte or Glossy | Long-Lasting Wear |
| Sheer | Light Wash of Color | Subtle, No-Makeup Look |
Lip Liner Tips
Using a lip liner can enhance your lipstick application and define your lips. Here are some tips to master the art of lip liner:
- Choose the Right Shade: Select a lip liner that matches your lipstick or is slightly darker.
- Start with a Clean Canvas: Ensure your lips are clean and exfoliated. Use a foundation type or concealer to neutralize the natural lip color.
- Outline Your Lips: Begin by outlining the natural shape of your lips. Use small, light strokes for precision.
- Fill In: Fill in the entire lip area with the liner. This helps in making the lipstick last longer.
- Blend: Blend the edges with a lip brush for a seamless look.
Using these beauty hacks and makeup tips can make a significant difference in your lipstick application. A well-applied lip liner prevents lipstick from bleeding and enhances the overall appearance of your lips. Remember to keep your makeup tools clean and sharpen your lip liner regularly for precise application. Experiment with different cosmetic products and beauty techniques to find what works best for you.
Finishing Touches
In a makeup tutorial, the finishing touches are crucial. They ensure your look stays flawless all day. It’s the final step that ties your makeup together. Let’s explore the essential finishing touches that will elevate your makeup game. These include setting spray and highlighter application. Both steps are vital for a polished look.
Setting Spray
Setting spray is a must-have in your makeup products. It locks in your look and keeps it fresh. After applying your makeup, hold the setting spray about 8-10 inches from your face. Close your eyes and mist your face in an “X” and “T” motion. This ensures even coverage. Here are some benefits of using setting spray:
- It helps your makeup last longer.
- Prevents your makeup from melting or fading.
- Gives a natural, dewy finish.
- Works well with all skin types.
When choosing a setting spray, consider your skin type:
| Skin Type | Recommended Setting Spray |
|---|---|
| Oily Skin | Matte Finish Setting Spray |
| Dry Skin | Dewy Finish Setting Spray |
| Combination Skin | Hydrating Setting Spray |
Using a setting spray is a simple yet effective beauty hack. It ensures your makeup looks perfect throughout the day. This step is essential in any beauty tutorial.
Highlighter Application
Highlighter adds a beautiful glow to your face. It enhances your features and gives a radiant finish. Applying highlighter is easy with the right makeup techniques. Follow these makeup tips for a flawless highlighter application:
- Choose the right shade of highlighter for your skin tone. Light shades for fair skin, golden shades for medium skin, and bronze shades for dark skin.
- Apply highlighter to the high points of your face. These include the cheekbones, brow bones, bridge of the nose, and cupid’s bow.
- Use a small, fluffy brush for precise application. This helps in blending the product seamlessly.
- Blend the highlighter well to avoid harsh lines. Use gentle, circular motions for a natural finish.
Here are some common highlighter placements:
| Face Area | Highlighter Placement |
|---|---|
| Cheekbones | Above the blush, on the highest point |
| Brow Bones | Just below the eyebrows |
| Bridge of the Nose | Down the center of the nose |
| Cupid’s Bow | On the upper lip’s curve |
Highlighter application enhances your overall look. It brings attention to your best features. Incorporate this step in your skincare routine for a glowing finish. This technique is a staple in cosmetics application and contouring tips.

Credit: www.pinterest.com
Frequently Asked Questions
How To Apply Foundation Properly?
To apply foundation properly, start with a clean, moisturized face. Use a brush, sponge, or fingers for even application. Blend well around the jawline and hairline. Set with powder for a long-lasting finish.
What Is The Best Eye Makeup For Beginners?
For beginners, start with neutral eyeshadows. Use lighter shades on the lid and darker shades in the crease. Blend well. Finish with eyeliner and mascara for a polished look.
How To Make Lipstick Last Longer?
To make lipstick last longer, exfoliate lips first. Apply lip balm, then use a lip liner to outline and fill in lips. Apply lipstick and blot with tissue. Reapply for a lasting finish.
What Are Essential Makeup Tools?
Essential makeup tools include brushes, sponges, eyelash curler, tweezers, and makeup remover. Quality tools ensure better application and blending.
Conclusion
Achieving a flawless makeup look is simpler than you might think. Practice and patience make perfect. Follow each step carefully for best results. Experiment with different products and techniques. Discover what works best for your skin. Makeup should enhance your natural beauty.
Have fun and express yourself. Confidence shines through. Remember, beauty comes from within. Keep learning and stay inspired!

Hypeladies.com, founded in 2020 by Susanna, is a premier digital platform dedicated to empowering women through insightful and practical content. Born out of Susanna’s personal experiences as a mother and professional, the website addresses the everyday challenges women face by providing guidance on fashion, beauty, parenting, health, and relationships. Hypeladies believes that knowledge is power, aiming to equip women with the information they need to make informed decisions, boost their confidence, and live their best lives. With a commitment to fostering a supportive community, Hypeladies.com serves as a comprehensive resource for women at all stages of life, inspiring them to achieve their goals and embrace their potential.
Discover more from Empowering Lifestyle Advice
Subscribe to get the latest posts sent to your email.